> ## Documentation Index
> Fetch the complete documentation index at: https://langchain-tutorial.mintlify.site/llms.txt
> Use this file to discover all available pages before exploring further.
# windows环境
# Windows安装入门
* 翻译:[xiaoshun007](https://github.com/xiaoshun007)
* 作者: [Wooseok-Jeong](https://github.com/jeong-wooseok)
* 评审: [Yun Eun](https://github.com/yuneun92), [MinJi Kang](https://www.linkedin.com/in/minji-kang-995b32230/)
* 校对 : [Q0211](https://github.com/Q0211)
* 本内容是 [LangChain Open Tutorial](https://github.com/LangChain-OpenTutorial/LangChain-OpenTutorial) 的一部分
## 概述
本教程将详细介绍如何在 Windows 环境下安装 LangChain 包。您可以通过克隆所需的 GitHub 仓库、通过 pyenv 和 Poetry 批量安装与作者相同的软件包、安装 Visual Studio Code 及 Jupyter 扩展,轻松搭建开发环境。
### 目录
* [概述](#概述)
* [安装 git](#安装git)
* [安装 pyenv](#安装pyenv)
* [安装 Poetry](#安装Poetry)
* [安装 Visual Studio Code](#安装VSCode)
* [安装 Jupyter Extension](#安装Jupyter扩展)
### 下载链接
* [下载git](https://git-scm.com/download/win)
* [下载Visual Studio Code](https://code.visualstudio.com/download)
***
## 安装git
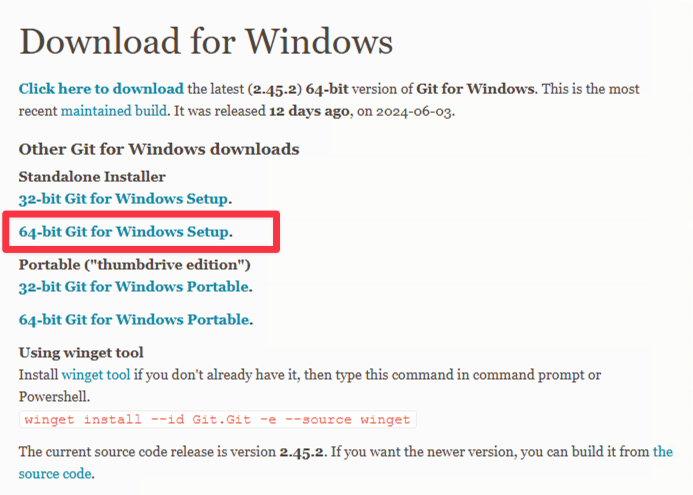
[下载git](https://git-scm.com/download/win)
下载 64 位 Git 的 Windows 安装程序。
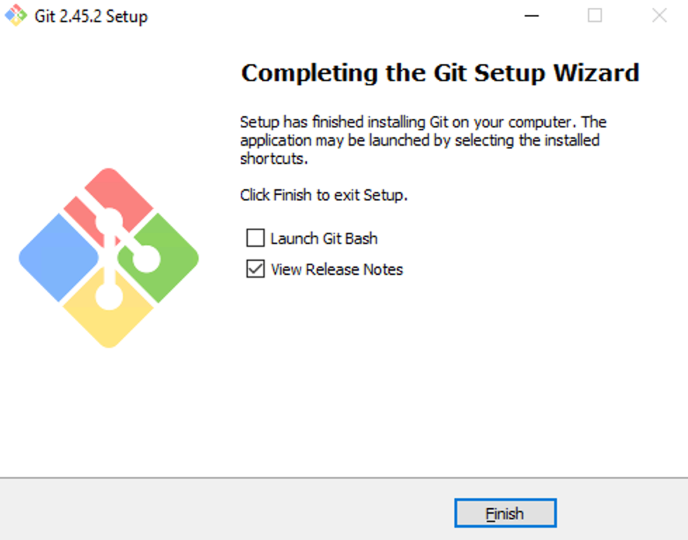
 按照安装步骤确认并继续
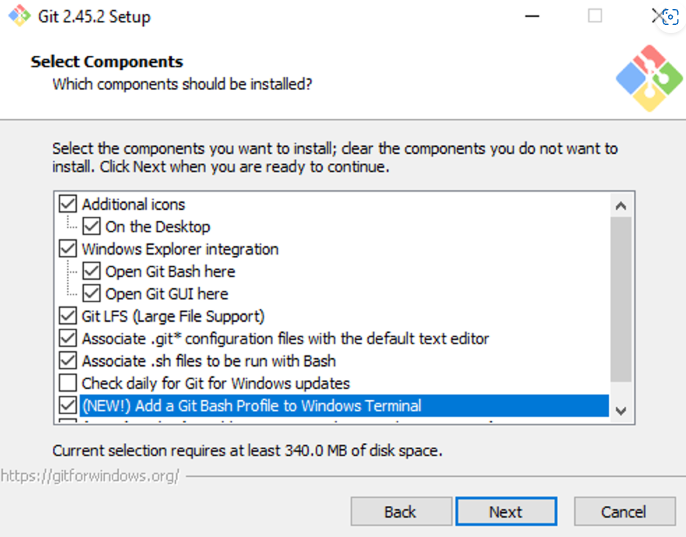 在后续所有步骤中均点击 Next 按钮以继续安装。
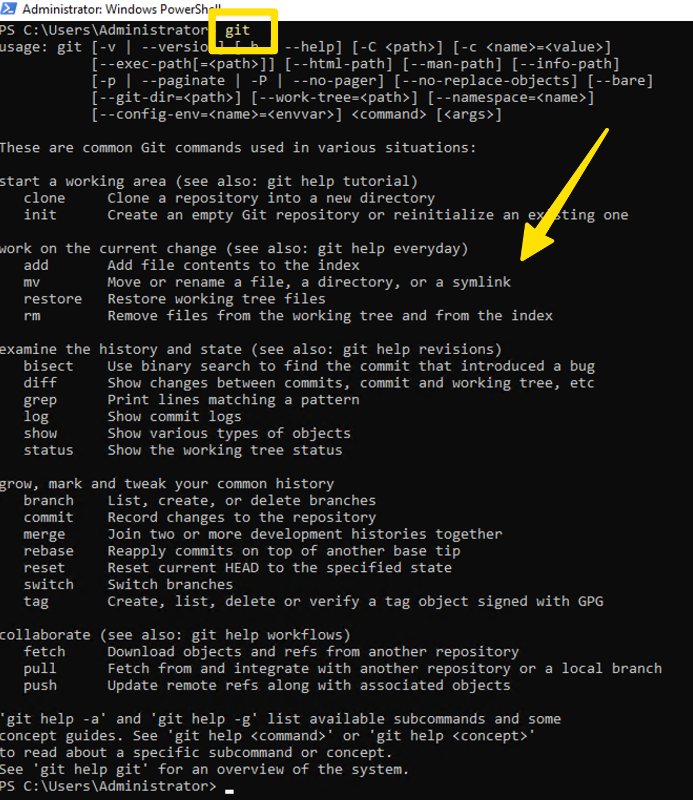
 按 Windows + R 键 - 必须以管理员身份运行 PowerShell
输入命令 "git" 并验证输出结果是否与下图所示一致
```powershell theme={null}
git
```
按 Windows + R 键 - 必须以管理员身份运行 PowerShell
输入命令 "git" 并验证输出结果是否与下图所示一致
```powershell theme={null}
git
```
 * 应用 PowerShell 策略
首先,以"管理员"身份运行 Windows PowerShell。
输入以下命令以应用该策略:
```powershell theme={null}
Set-ExecutionPolicy RemoteSigned -Scope CurrentUser -Force
```
应用完成后,请关闭并重新启动 Windows PowerShell。在后续操作中,运行 Windows PowerShell 时均需选择"以管理员身份运行"。
## 安装pyenv
在安装 Python 前,请先安装 pyenv。pyenv 通过创建虚拟化环境来防止软件包之间发生冲突。
```bash theme={null}
git clone https://github.com/pyenv-win/pyenv-win.git "$env:USERPROFILE\.pyenv"
```
* 添加环境变量
请复制并粘贴以下内容后执行。
```powershell theme={null}
[System.Environment]::SetEnvironmentVariable('PYENV', $env:USERPROFILE + "\.pyenv\pyenv-win\", "User")
[System.Environment]::SetEnvironmentVariable('PYENV_ROOT', $env:USERPROFILE + "\.pyenv\pyenv-win\", "User")
[System.Environment]::SetEnvironmentVariable('PYENV_HOME', $env:USERPROFILE + "\.pyenv\pyenv-win\", "User")
```
请复制并粘贴以下内容后执行。
```powershell theme={null}
[System.Environment]::SetEnvironmentVariable('PATH', $env:USERPROFILE + "\.pyenv\pyenv-win\bin;" + $env:USERPROFILE + "\.pyenv\pyenv-win\shims;" + [System.Environment]::GetEnvironmentVariable('PATH', "User"), "User")
```
请关闭当前 Windows PowerShell 并重新启动。
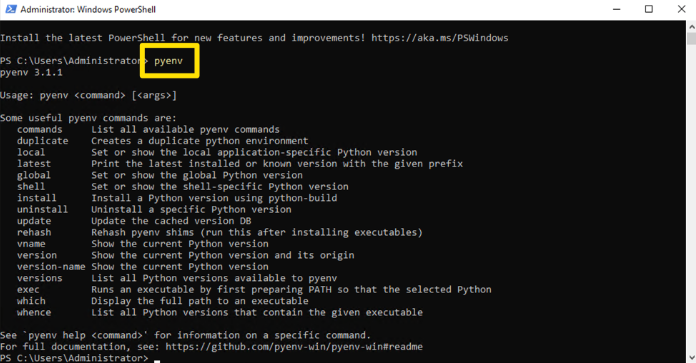
输入以下命令以验证其是否正常运行:
```powershell theme={null}
pyenv
```
* 应用 PowerShell 策略
首先,以"管理员"身份运行 Windows PowerShell。
输入以下命令以应用该策略:
```powershell theme={null}
Set-ExecutionPolicy RemoteSigned -Scope CurrentUser -Force
```
应用完成后,请关闭并重新启动 Windows PowerShell。在后续操作中,运行 Windows PowerShell 时均需选择"以管理员身份运行"。
## 安装pyenv
在安装 Python 前,请先安装 pyenv。pyenv 通过创建虚拟化环境来防止软件包之间发生冲突。
```bash theme={null}
git clone https://github.com/pyenv-win/pyenv-win.git "$env:USERPROFILE\.pyenv"
```
* 添加环境变量
请复制并粘贴以下内容后执行。
```powershell theme={null}
[System.Environment]::SetEnvironmentVariable('PYENV', $env:USERPROFILE + "\.pyenv\pyenv-win\", "User")
[System.Environment]::SetEnvironmentVariable('PYENV_ROOT', $env:USERPROFILE + "\.pyenv\pyenv-win\", "User")
[System.Environment]::SetEnvironmentVariable('PYENV_HOME', $env:USERPROFILE + "\.pyenv\pyenv-win\", "User")
```
请复制并粘贴以下内容后执行。
```powershell theme={null}
[System.Environment]::SetEnvironmentVariable('PATH', $env:USERPROFILE + "\.pyenv\pyenv-win\bin;" + $env:USERPROFILE + "\.pyenv\pyenv-win\shims;" + [System.Environment]::GetEnvironmentVariable('PATH', "User"), "User")
```
请关闭当前 Windows PowerShell 并重新启动。
输入以下命令以验证其是否正常运行:
```powershell theme={null}
pyenv
```
 * 安装 python
安装 Python 3.11
```powershell theme={null}
pyenv install 3.11
```
将 Python 3.11 设置为默认运行时环境。
```powershell theme={null}
pyenv global 3.11
```
检查 Python 版本
```powershell theme={null}
python --version
```
请确保您已安装 3.11.9 版本(安装 3.11.11 版本亦可!)。
## 安装Poetry
请运行以下命令以安装 Poetry 包管理工具。
```bash theme={null}
pip3 install poetry
```
* [Link to LangChain-OpenTutorial.git](https://github.com/LangChain-OpenTutorial/LangChain-OpenTutorial.git)
导航至 Documents 文件夹。
```powershell theme={null}
cd ~/Documents
```
请执行以下命令以获取源代码。
```powershell theme={null}
git clone https://github.com/LangChain-OpenTutorial/LangChain-OpenTutorial.git
```
请执行以下命令以切换到 LangChain-OpenTutorial 目录。
```powershell theme={null}
cd LangChain-OpenTutorial
```
正在设置 Python 虚拟环境
```powershell theme={null}
poetry shell
```
批量更新 Python 包
```powershell theme={null}
poetry update
```
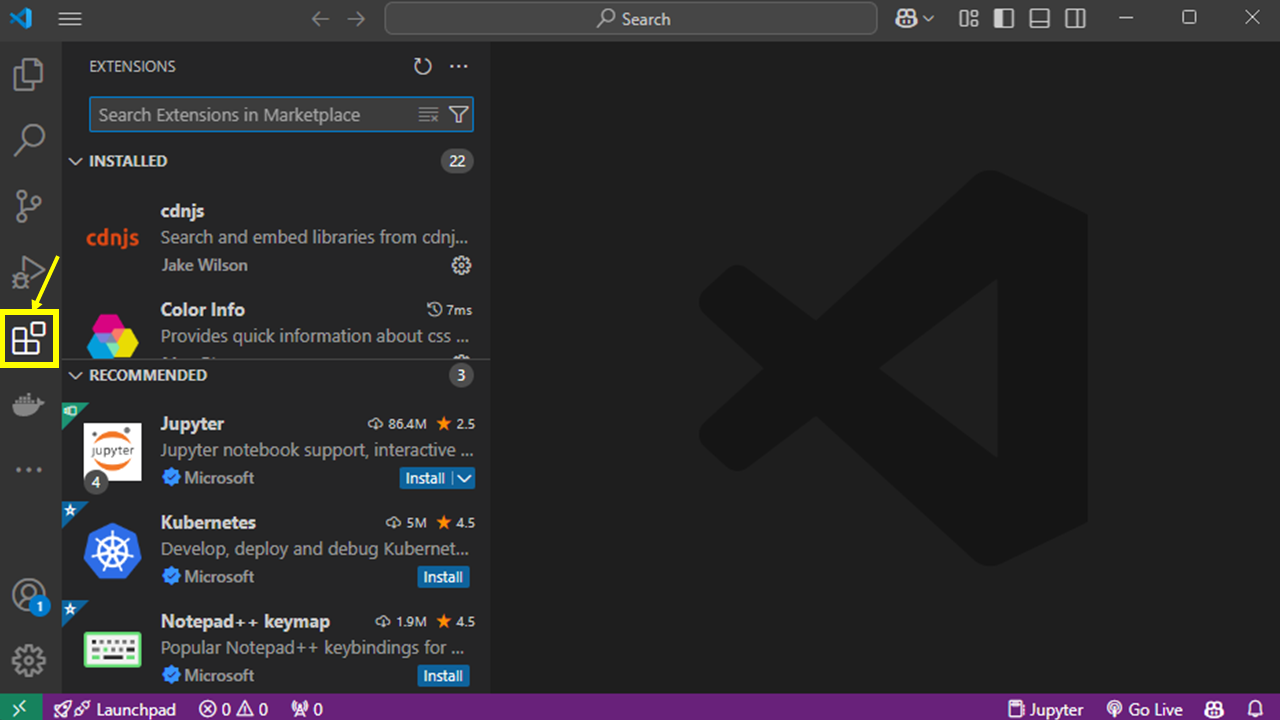
## 安装VSCode
下载Visual Studio Code
* [下载Visual Studio Code](https://code.visualstudio.com/download)
安装已下载的 Visual Studio Code (把它拷贝到应用程序文件夹)
在扩展程序的左侧菜单中点击 Jupyter 的“安装”按钮
* 安装 python
安装 Python 3.11
```powershell theme={null}
pyenv install 3.11
```
将 Python 3.11 设置为默认运行时环境。
```powershell theme={null}
pyenv global 3.11
```
检查 Python 版本
```powershell theme={null}
python --version
```
请确保您已安装 3.11.9 版本(安装 3.11.11 版本亦可!)。
## 安装Poetry
请运行以下命令以安装 Poetry 包管理工具。
```bash theme={null}
pip3 install poetry
```
* [Link to LangChain-OpenTutorial.git](https://github.com/LangChain-OpenTutorial/LangChain-OpenTutorial.git)
导航至 Documents 文件夹。
```powershell theme={null}
cd ~/Documents
```
请执行以下命令以获取源代码。
```powershell theme={null}
git clone https://github.com/LangChain-OpenTutorial/LangChain-OpenTutorial.git
```
请执行以下命令以切换到 LangChain-OpenTutorial 目录。
```powershell theme={null}
cd LangChain-OpenTutorial
```
正在设置 Python 虚拟环境
```powershell theme={null}
poetry shell
```
批量更新 Python 包
```powershell theme={null}
poetry update
```
## 安装VSCode
下载Visual Studio Code
* [下载Visual Studio Code](https://code.visualstudio.com/download)
安装已下载的 Visual Studio Code (把它拷贝到应用程序文件夹)
在扩展程序的左侧菜单中点击 Jupyter 的“安装”按钮
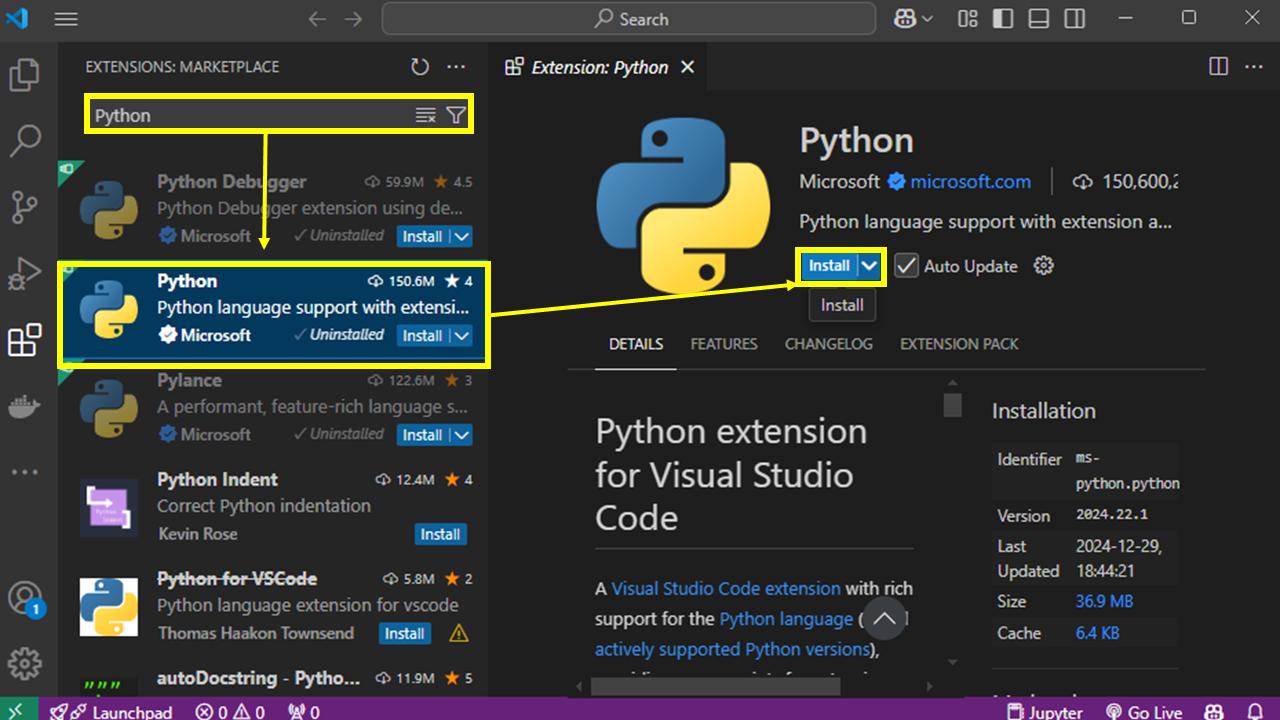
 ## 安装Jupyter扩展
搜索 "python" 并且安装
## 安装Jupyter扩展
搜索 "python" 并且安装
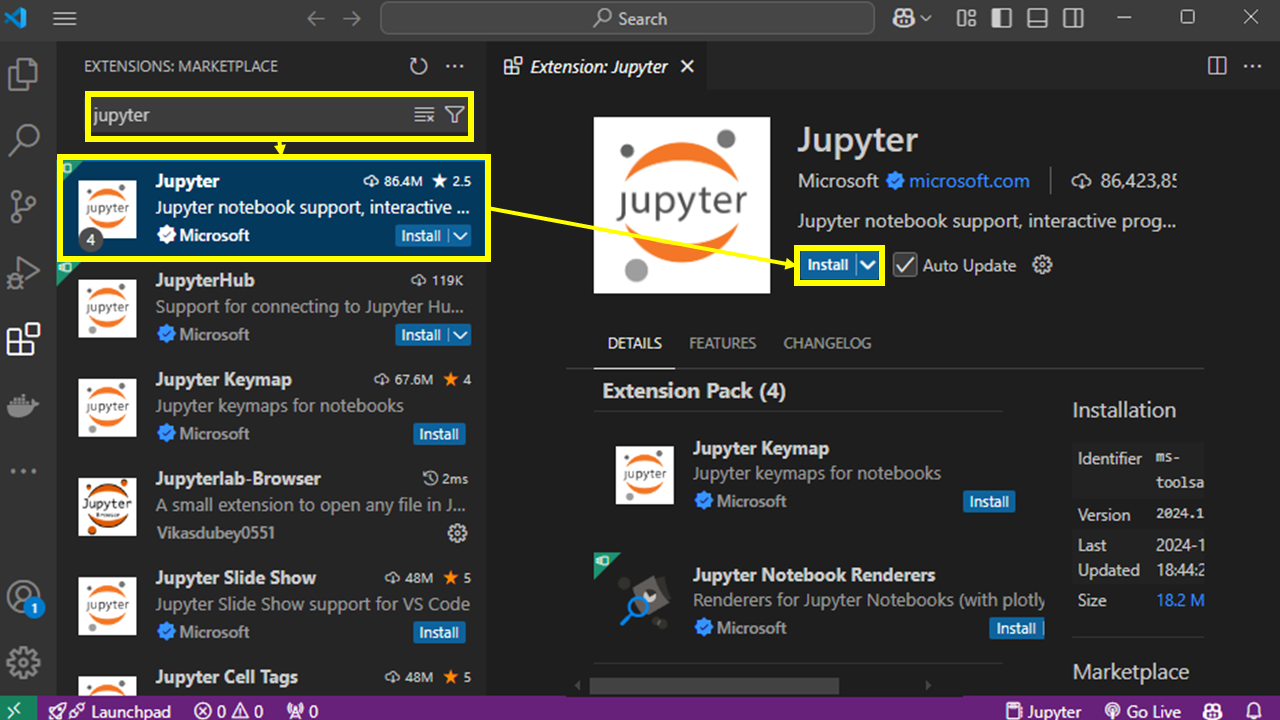
 搜索 "jupyter" 并完成安装
 请关闭并重启 Visual Studio Code。
安装已完成,此时可点击右上角的"选择内核"按钮。
点击 Python 环境 - 若未显示已安装的虚拟环境,请关闭并重启 Visual Studio Code。
请关闭并重启 Visual Studio Code。
安装已完成,此时可点击右上角的"选择内核"按钮。
点击 Python 环境 - 若未显示已安装的虚拟环境,请关闭并重启 Visual Studio Code。